Make a DIY Hydrophone

Below are some instructions that you can follow to make your own hydrophone to join in with the project by actively listening to the underwater sounds you can't usually hear. The outline below is the basis for a workshop that was run with Wicken Fen's Nature Champions young poeple's group.
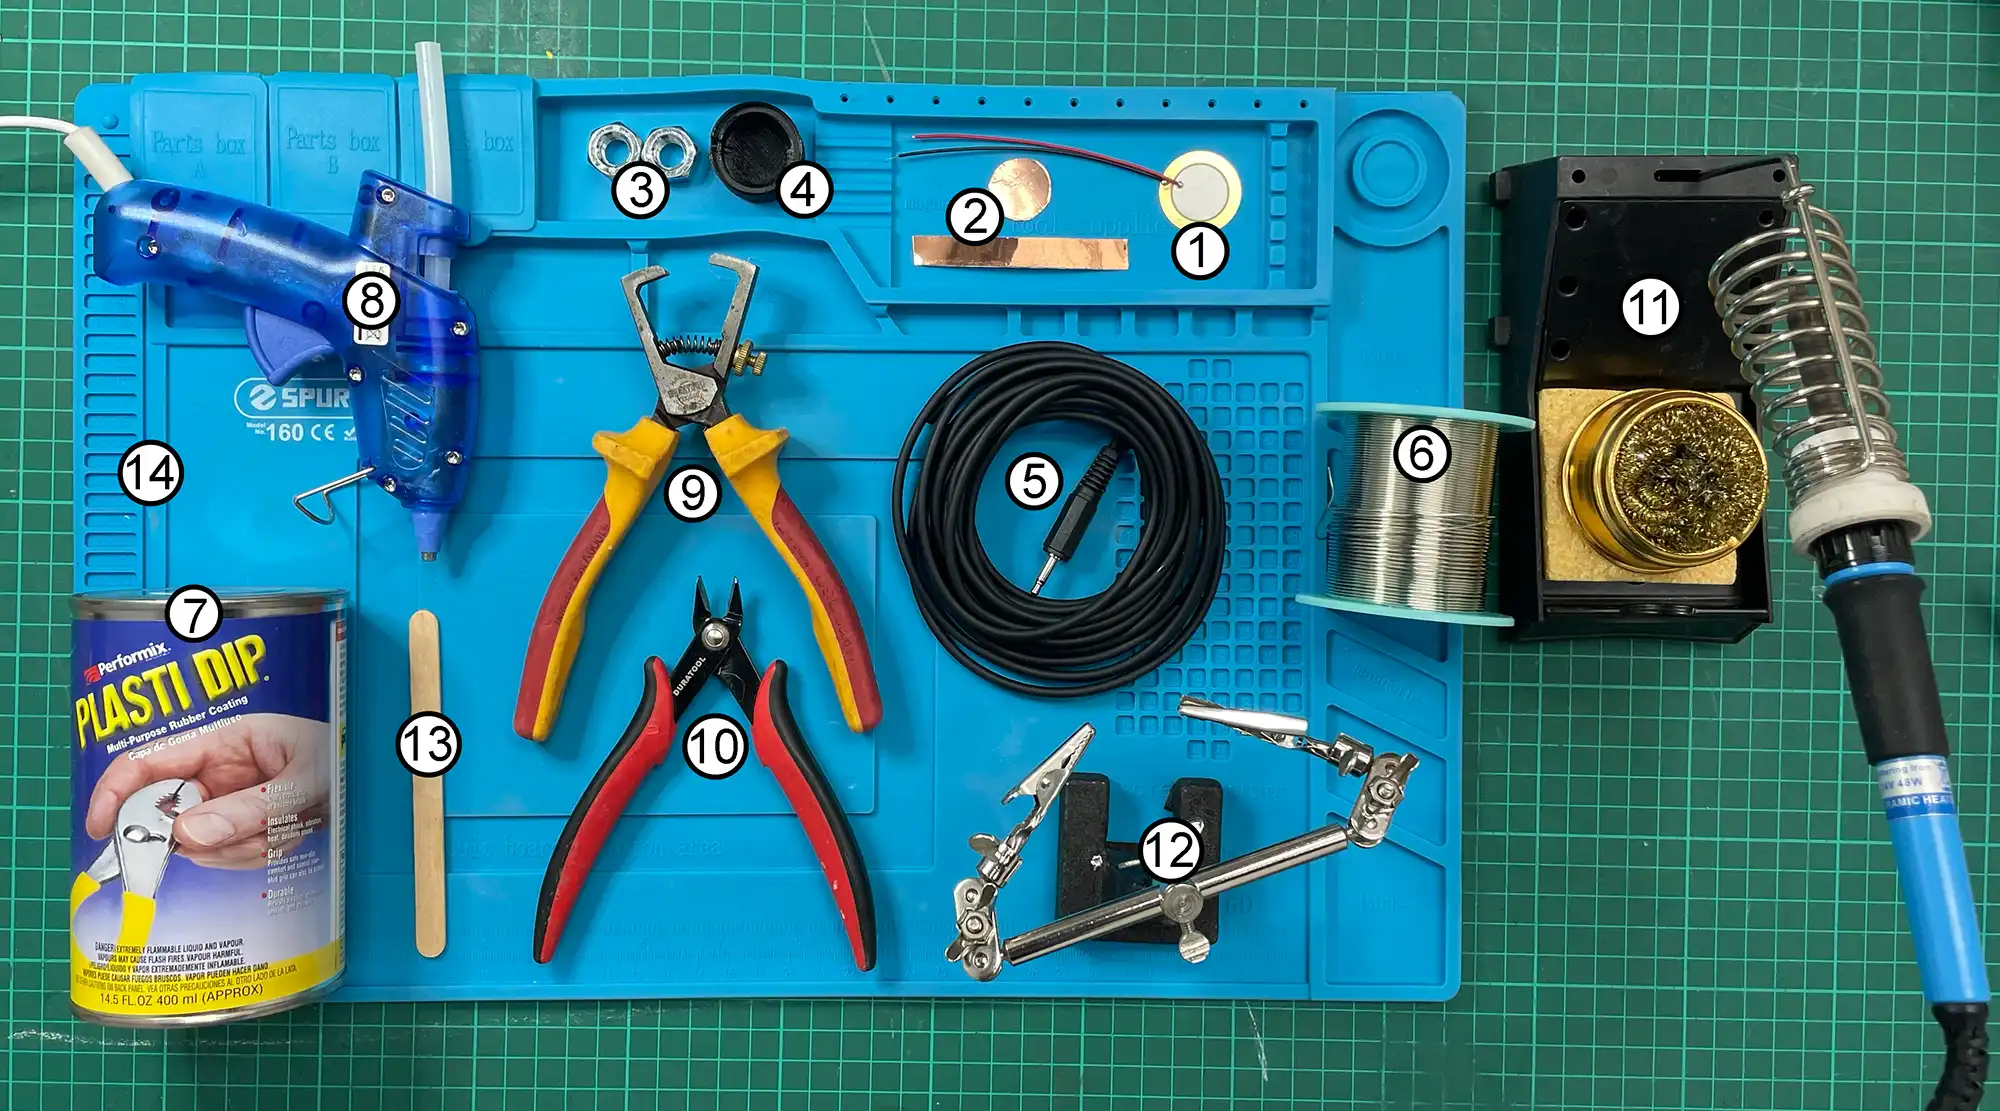
YOU WILL NEED :
MATERIALS
1 - 27mm Piezo microphone element
2 - Sticky backed copper tape
3 - 2 x M10 nuts
4 - 3D printed hydrophone cap ( a plastic bottle top can also work )
link to STL file to print with PLA cornstarch bioplastic
5 - 5m mono microphone cable with one 3.5mm mono jack end (cut a 10m cable in half)
6 - Solder
7 - Black plastidip
TOOLS
8 - Gluegun and glue sticks
9 - Wire strippers
10 - Wire cutters
11 - Soldering iron
12 - ‘Helping hand’ (not essential, but helpful!)
13 - Lollypop stick
14 - Heatproof soldering mat (not essential, but do protect your table and workspace)
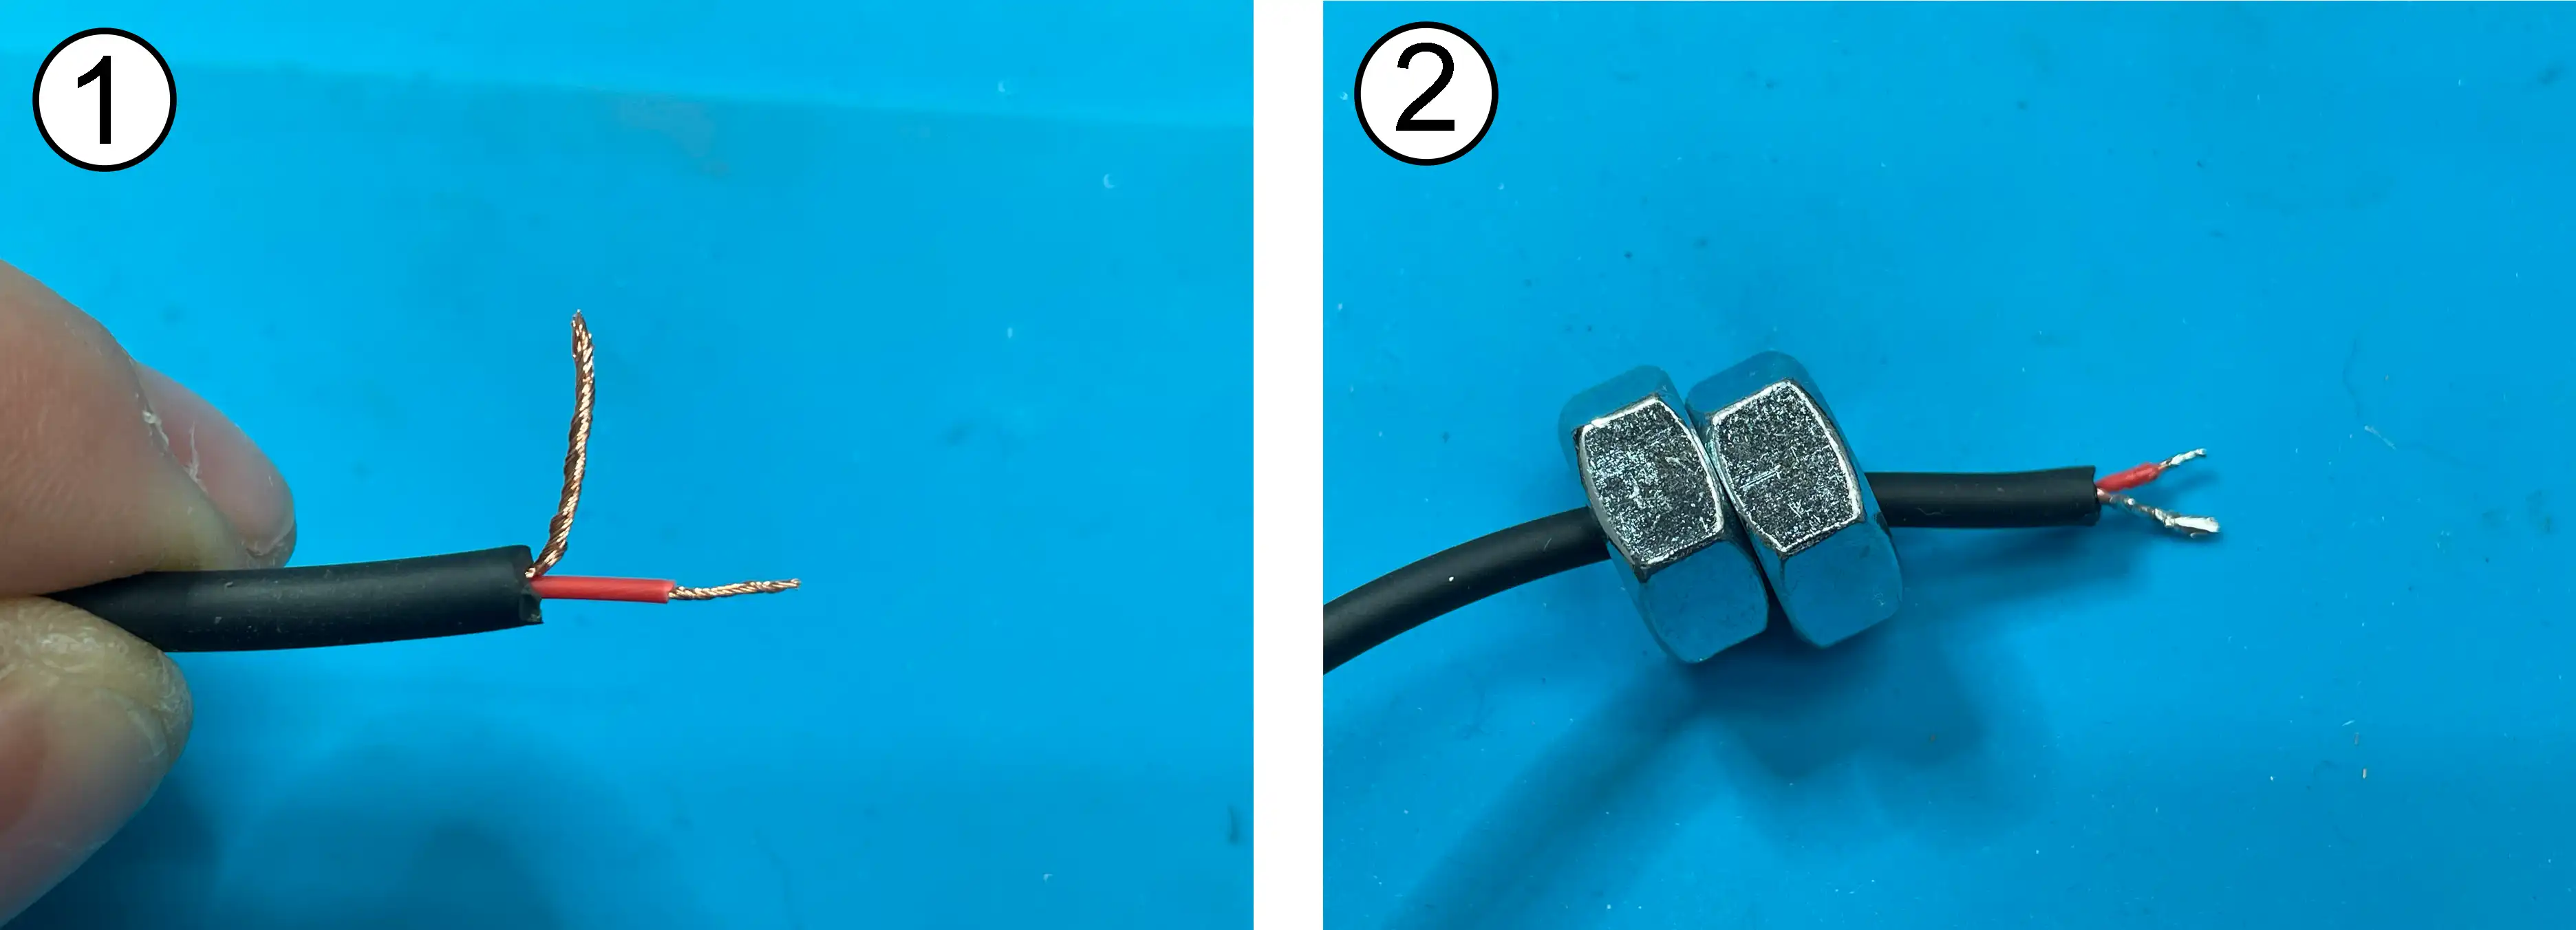
1 - Cut a 10m mono audio cable in half to make 2 x 5m lengths (use one half to make a hydrophone). Strip 10mm off the outer black insulation, twist the copper strands together. Strip 5mm off the red insulation and twist the wire strands together.
2 - Thread the 2 M10 bolts onto the cable - they can be pushed further along the cable so they are not in the way - but make sure they do not come off.
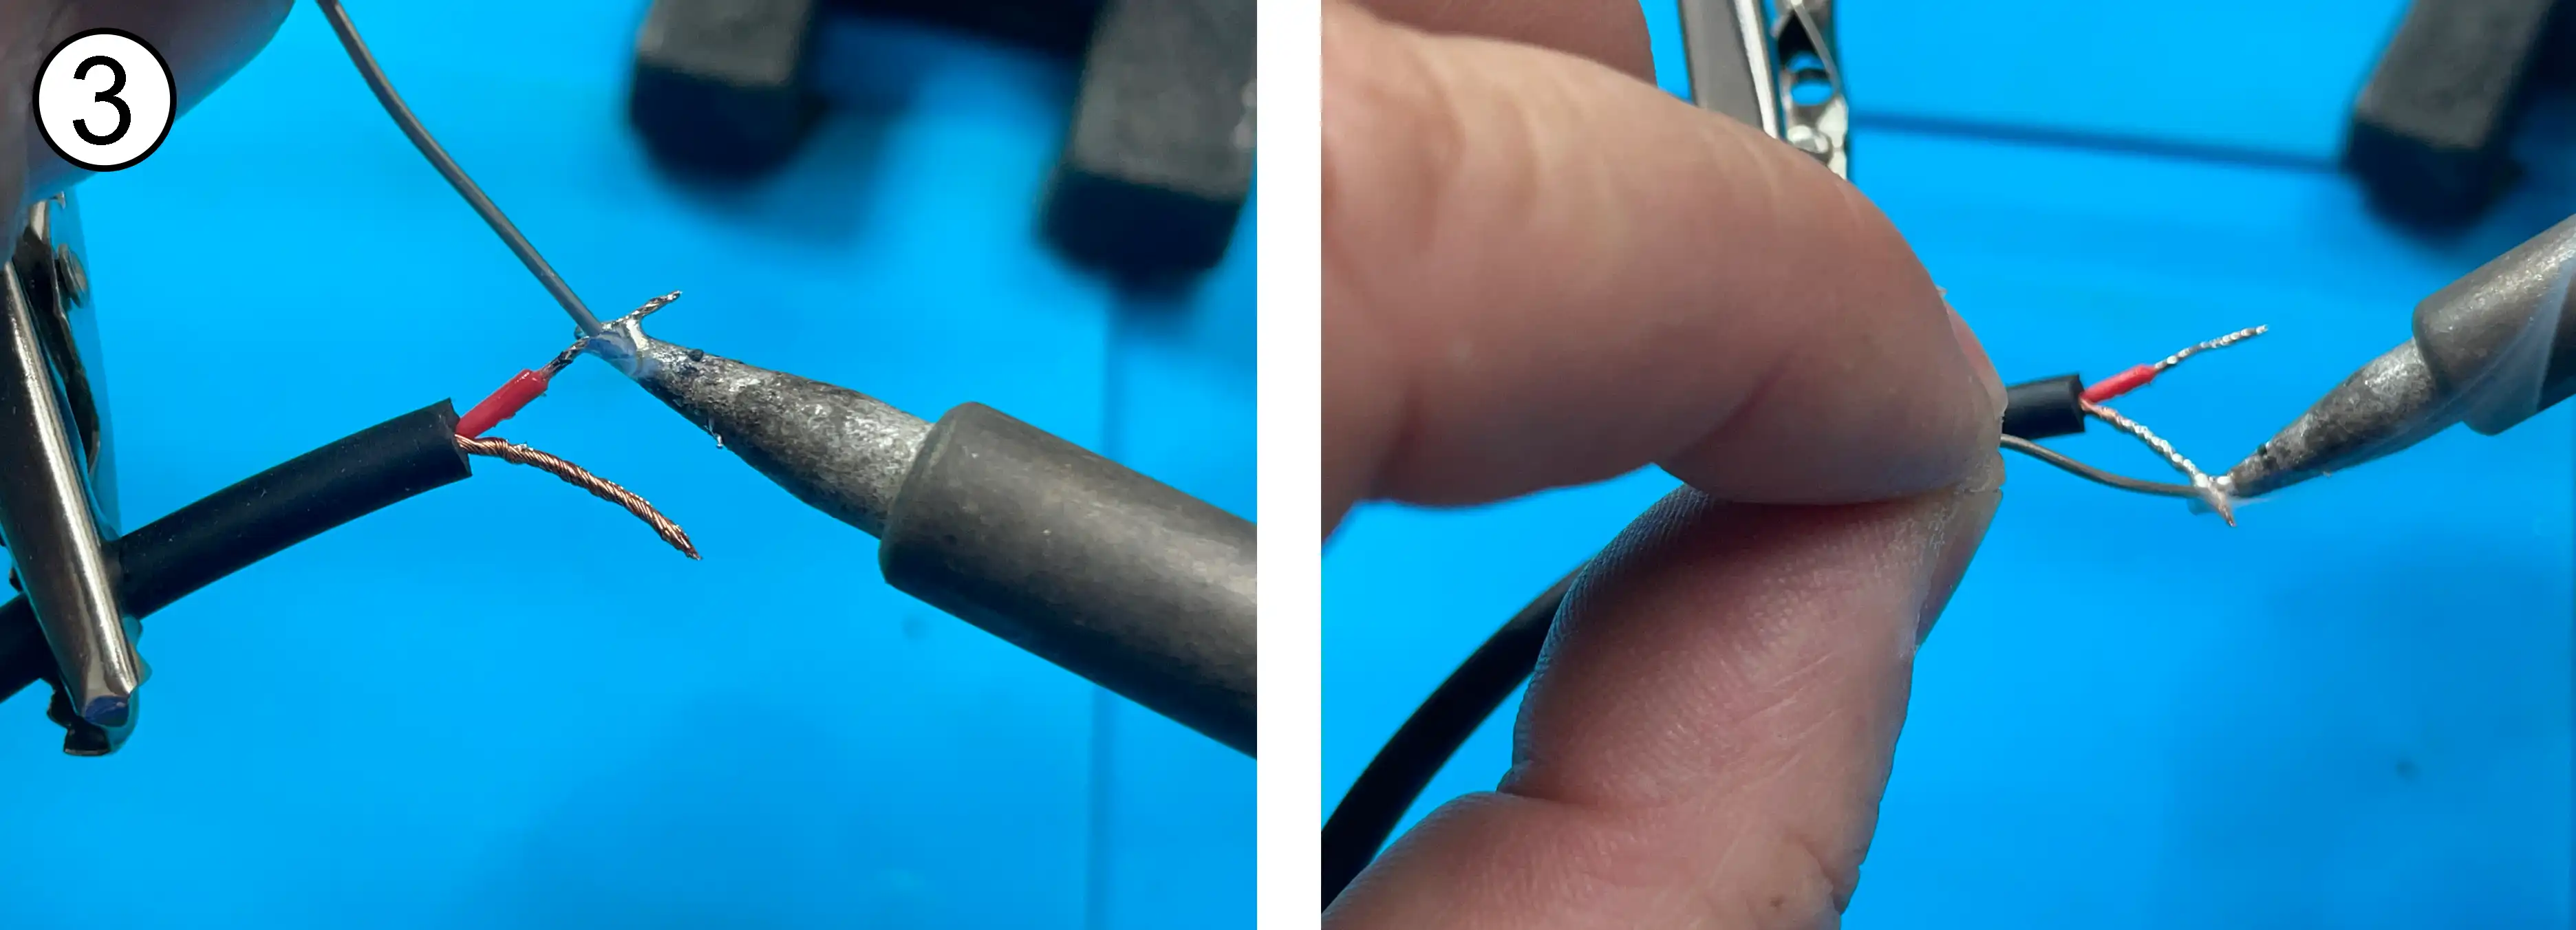
3 - Tin the exposed wires
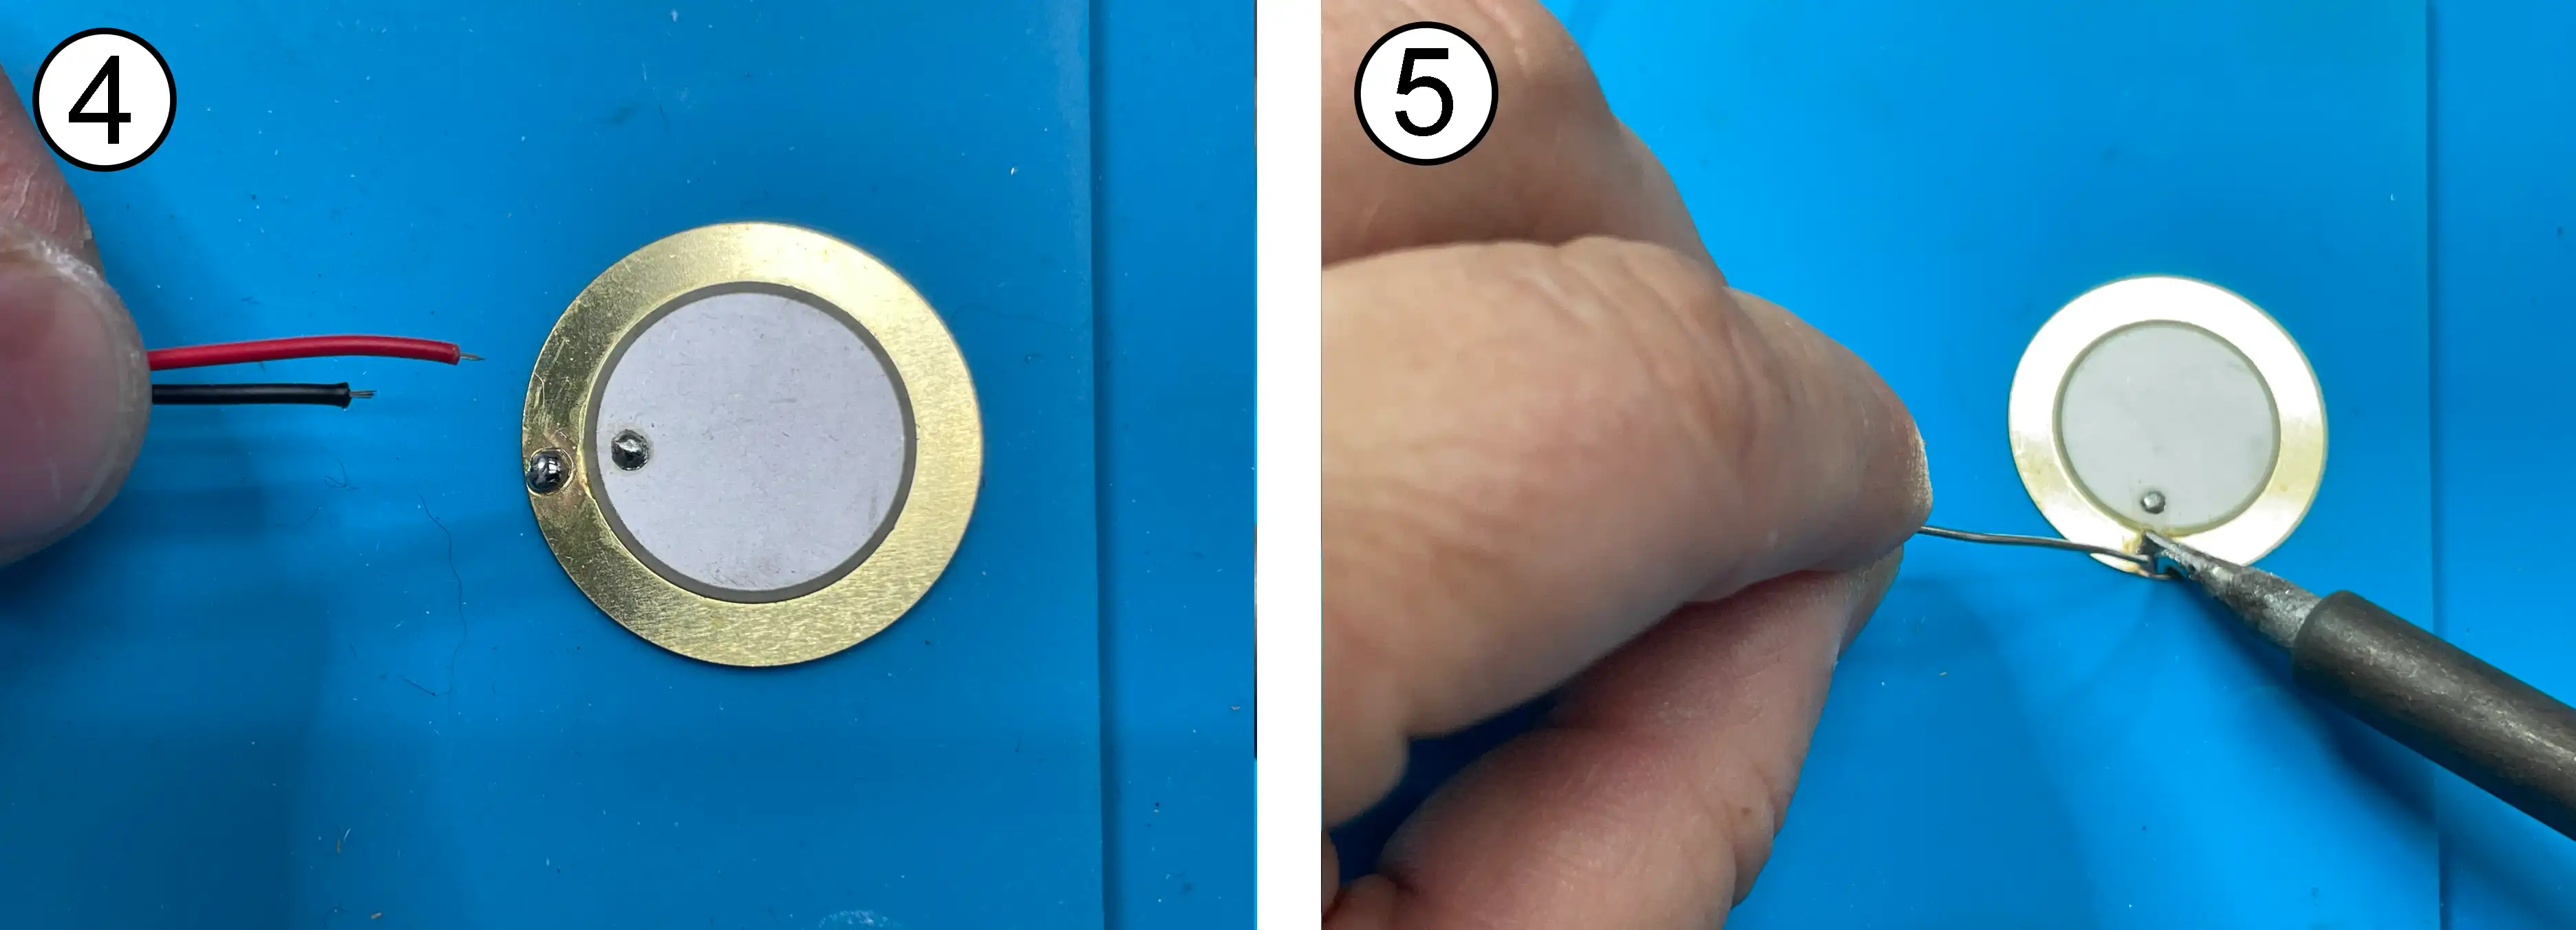
4 - Pull the wires off the 27mm piezo element (it's a good to idea to very gently hold the soldering iron on the solder for a very short moment while doing this. Be careful not to touch the piezo crystal area of the piezo disc.
5 - Add more solder to the brass part - place soldering iron directly on brass long enough for the solder to melt into a pool that is does not look like a ‘ball’ on top of the brass
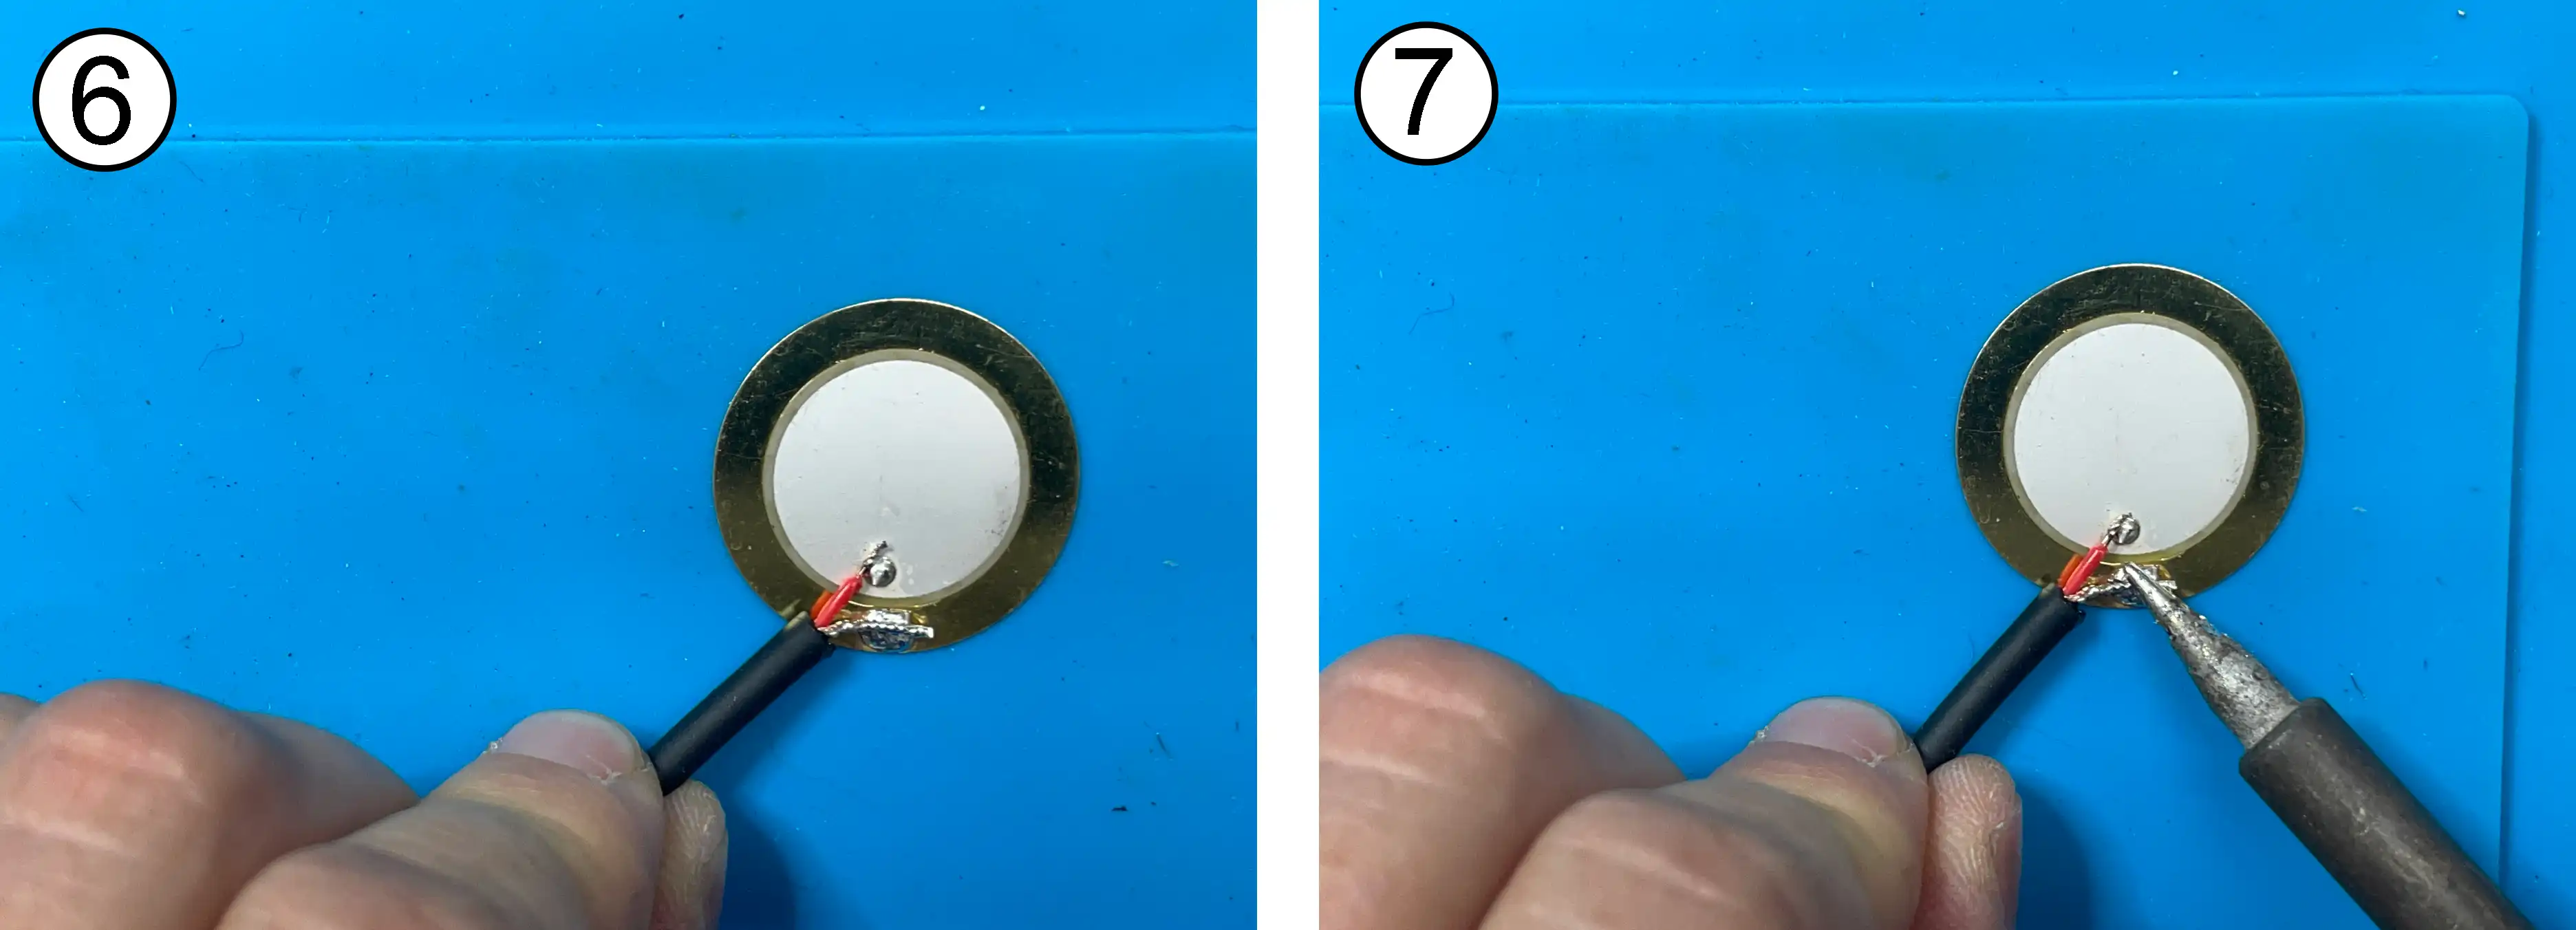
6 - trim the tinned ends of the cable so the two tinned wires line up with the existing ‘solder blobs’ on the piezo
7 - Solder the bare copper wire onto the brass part of the piezo.
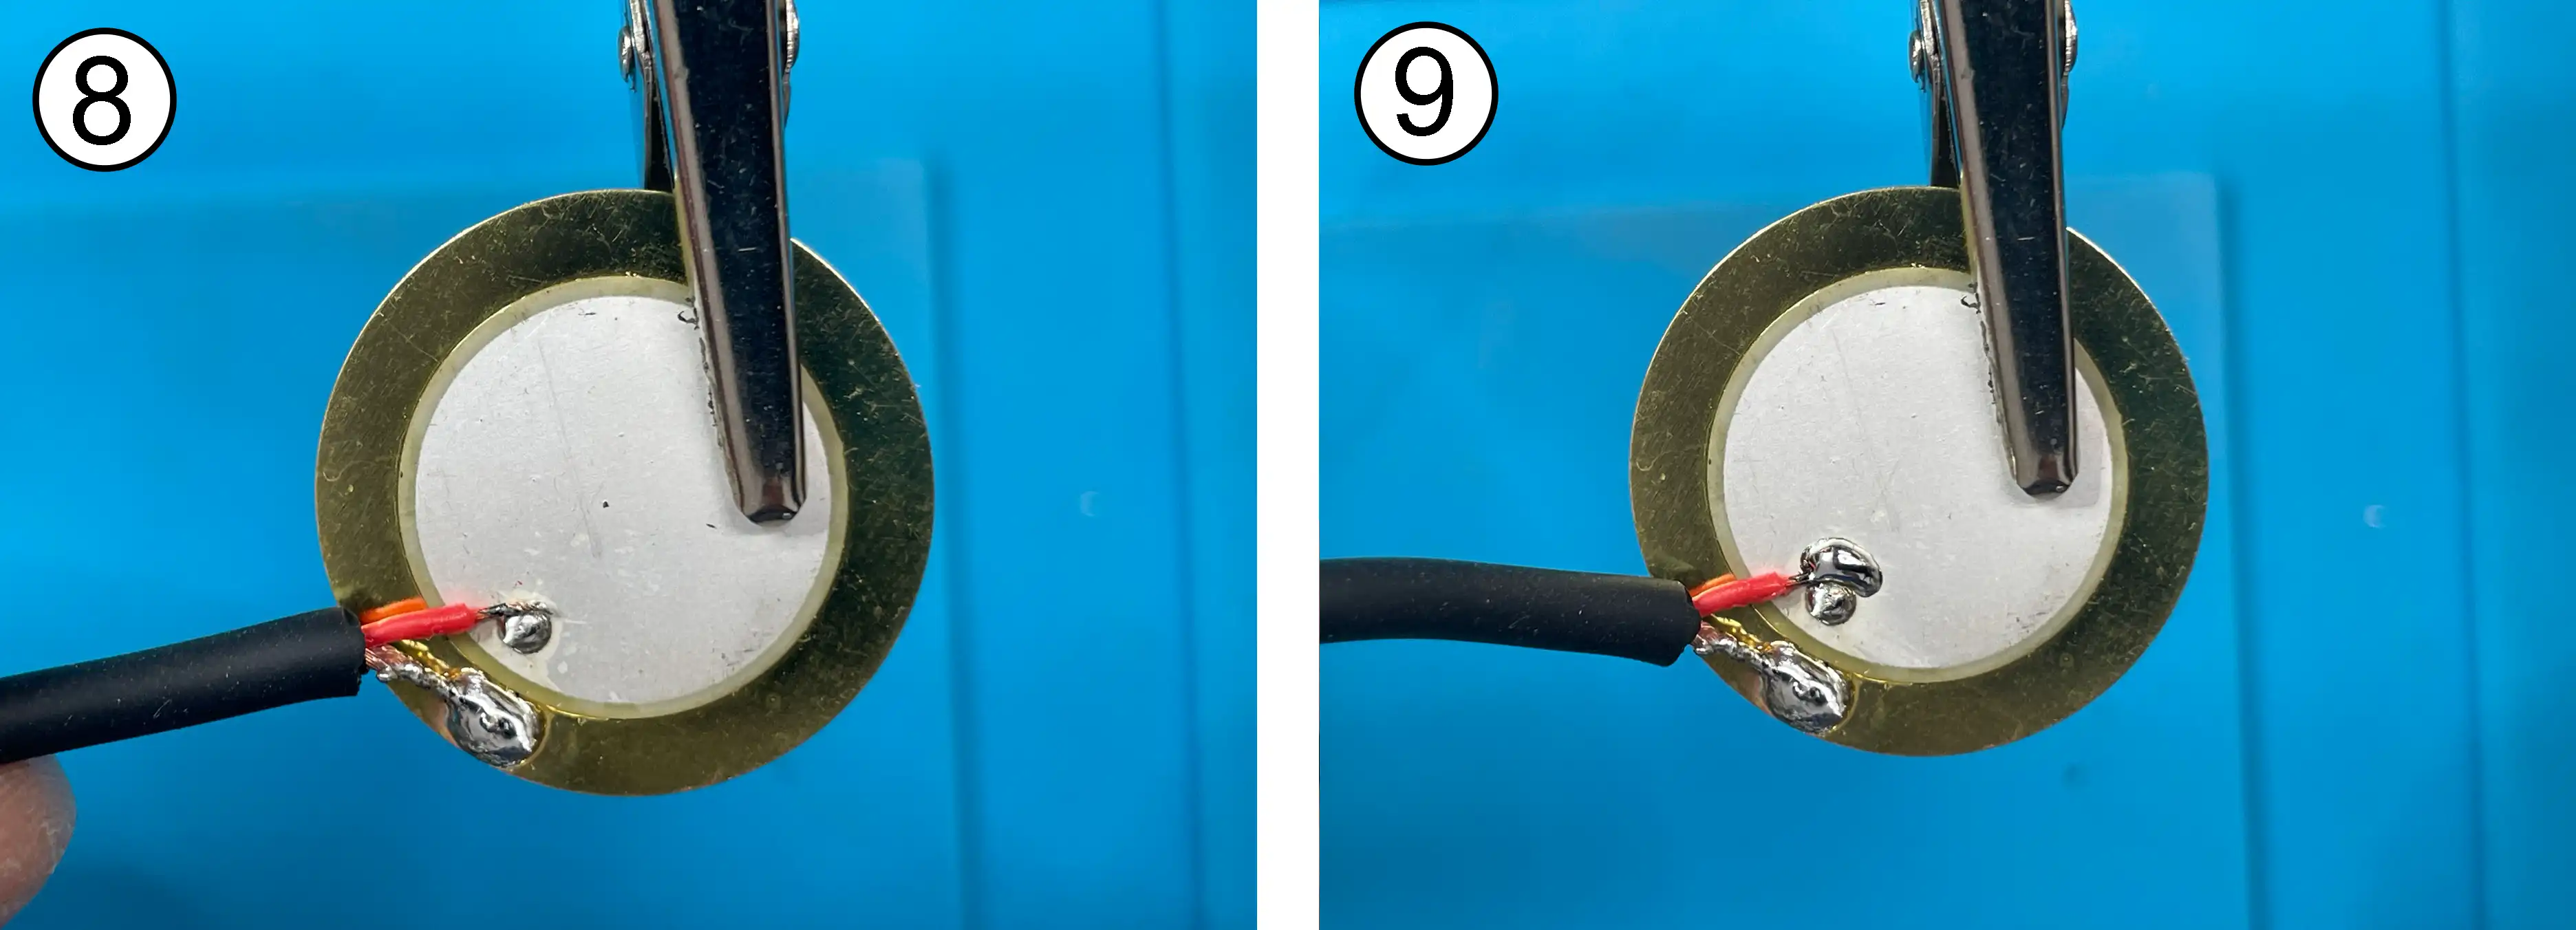
8 - Use the helping hand to arrange the red wire to be in contact with the existing solder blob on the piezo.
9 - Solder the red wire to this solder blob - careful not to solder through the crystals of the piezo onto the brass below. At this point, you can TEST the mic with a recorder to check your soldering
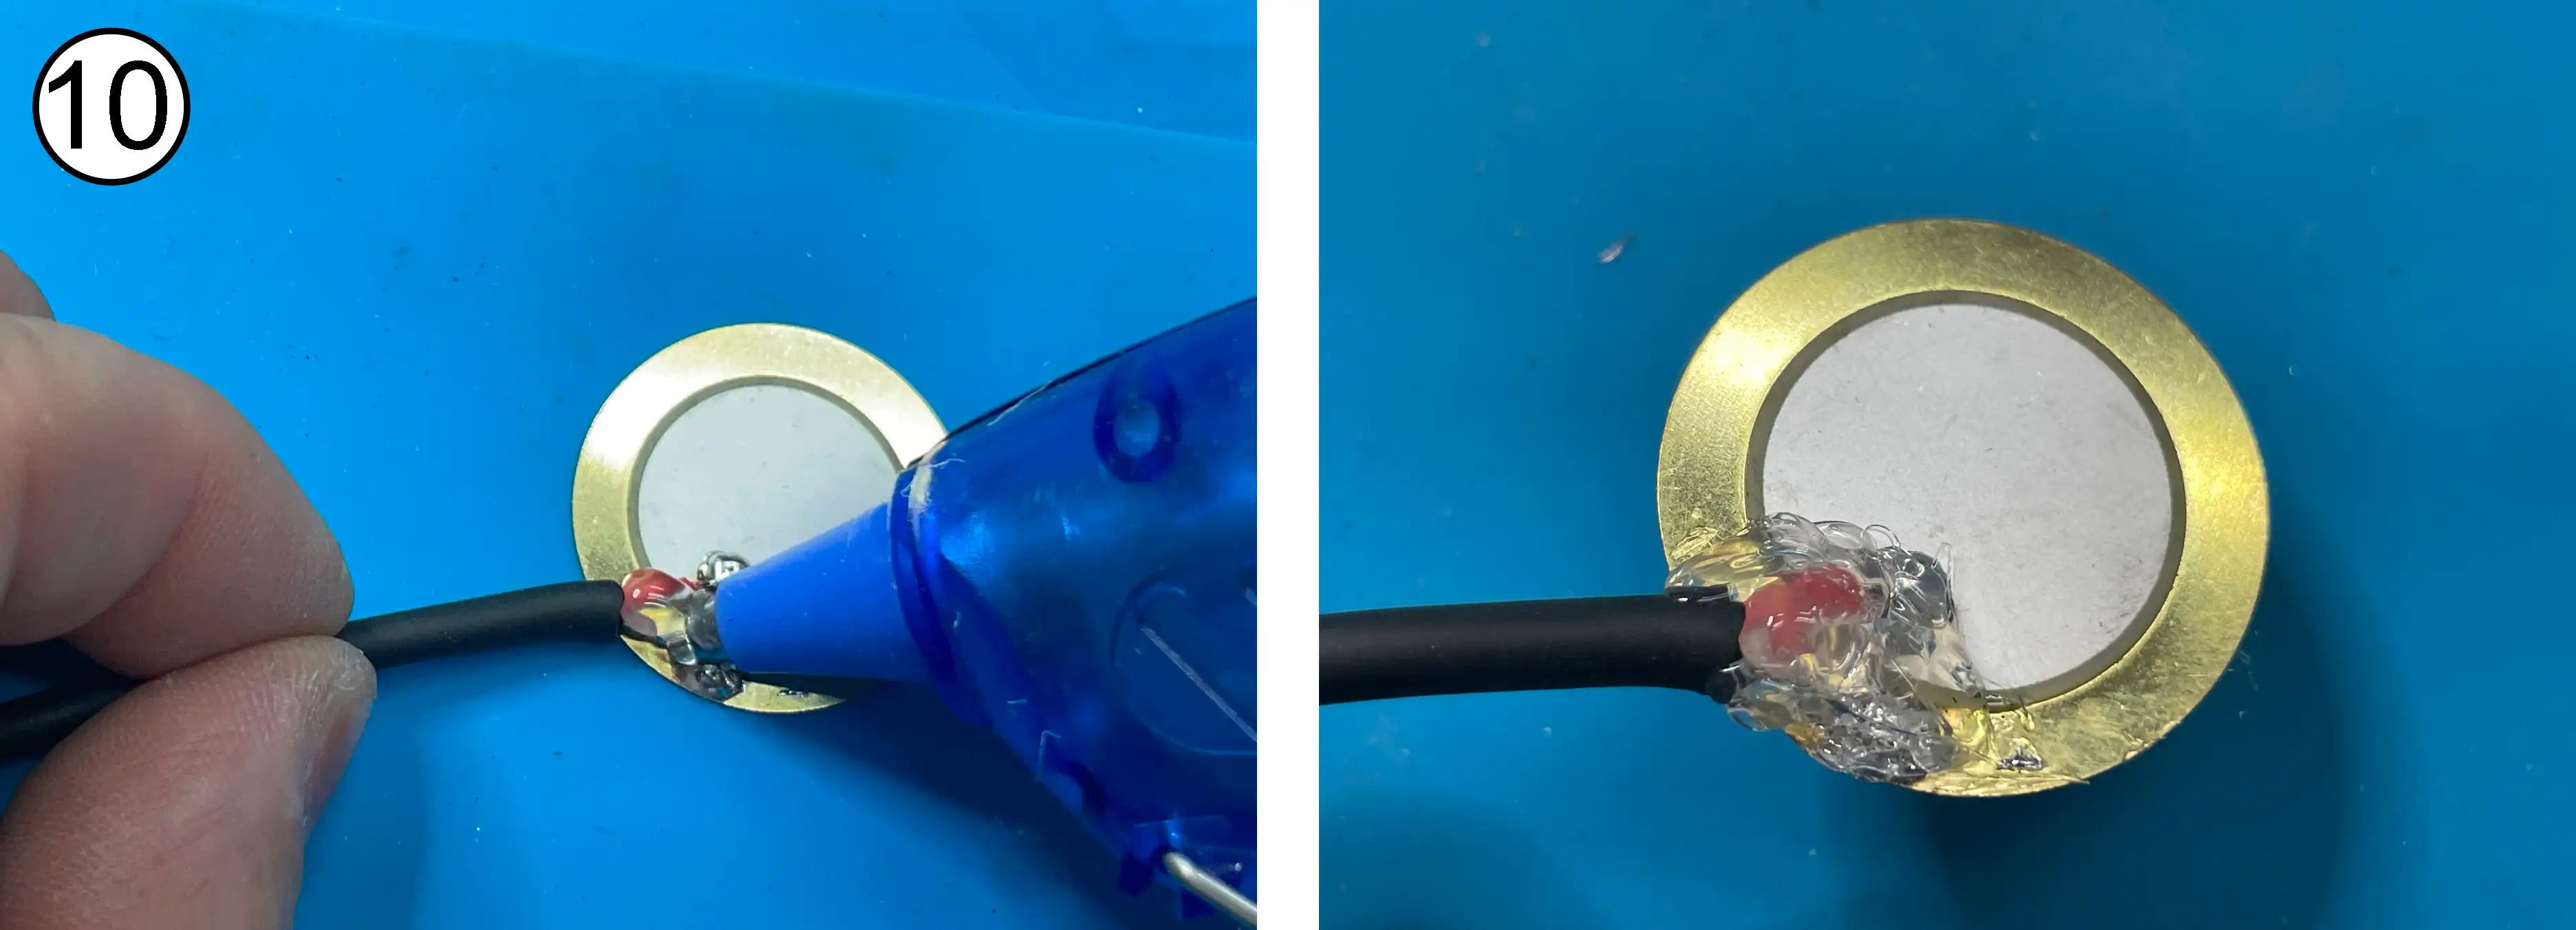
10 - cover the solder joins with hot glue - pay attention to where the black cable meets the brass. Do not use too much glue here. The glued piezo disc with cable needs to fit into the 'cap'.
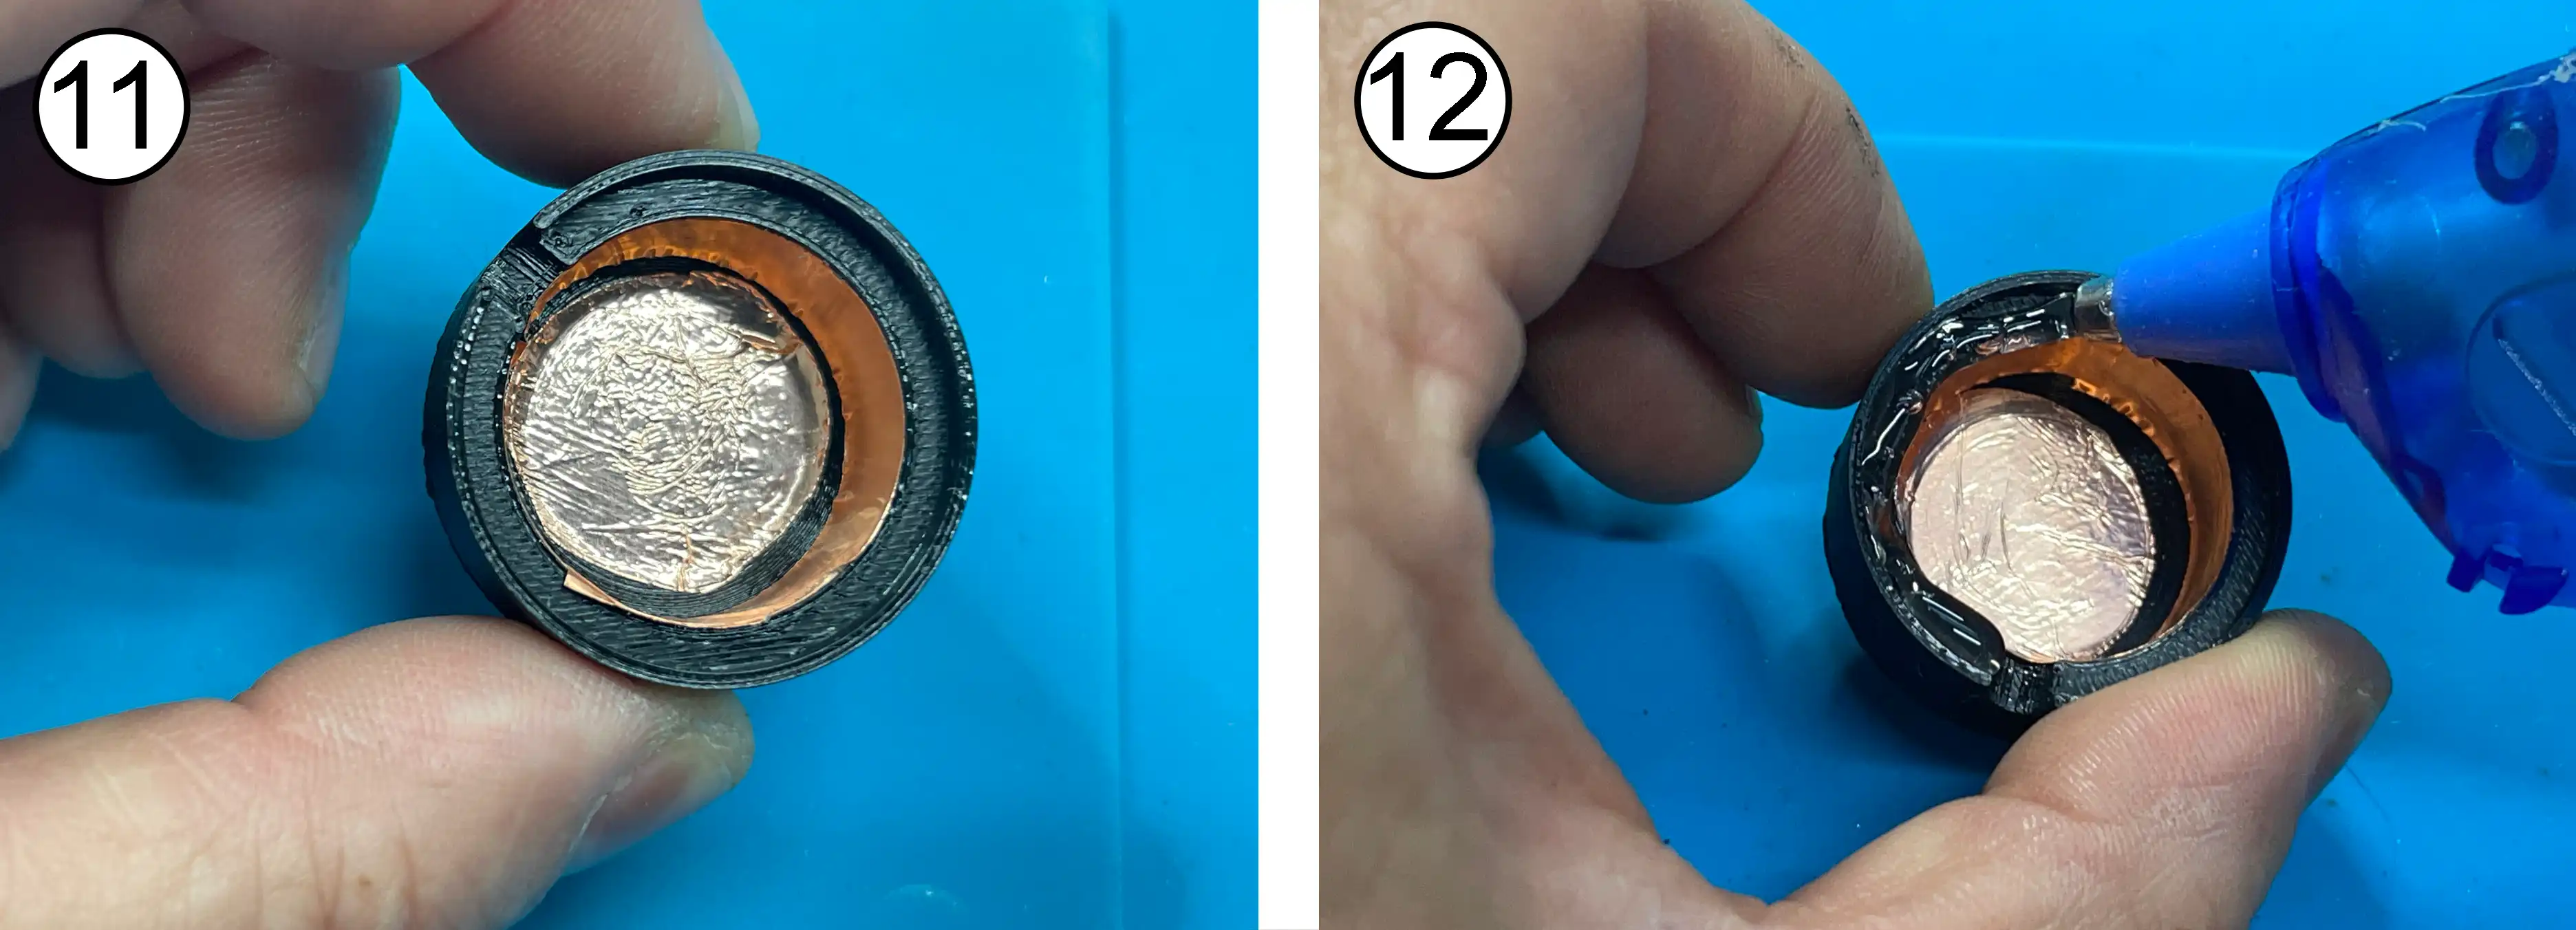
11 - line the inside of the hydrophone cap with copper tape. Use a strip 7cm x 1cm and a circle 2cm diameter
12 - Put a line of hot glue around the recessed rim of the hydrophone cap - then move to stage 13 QUICKLY
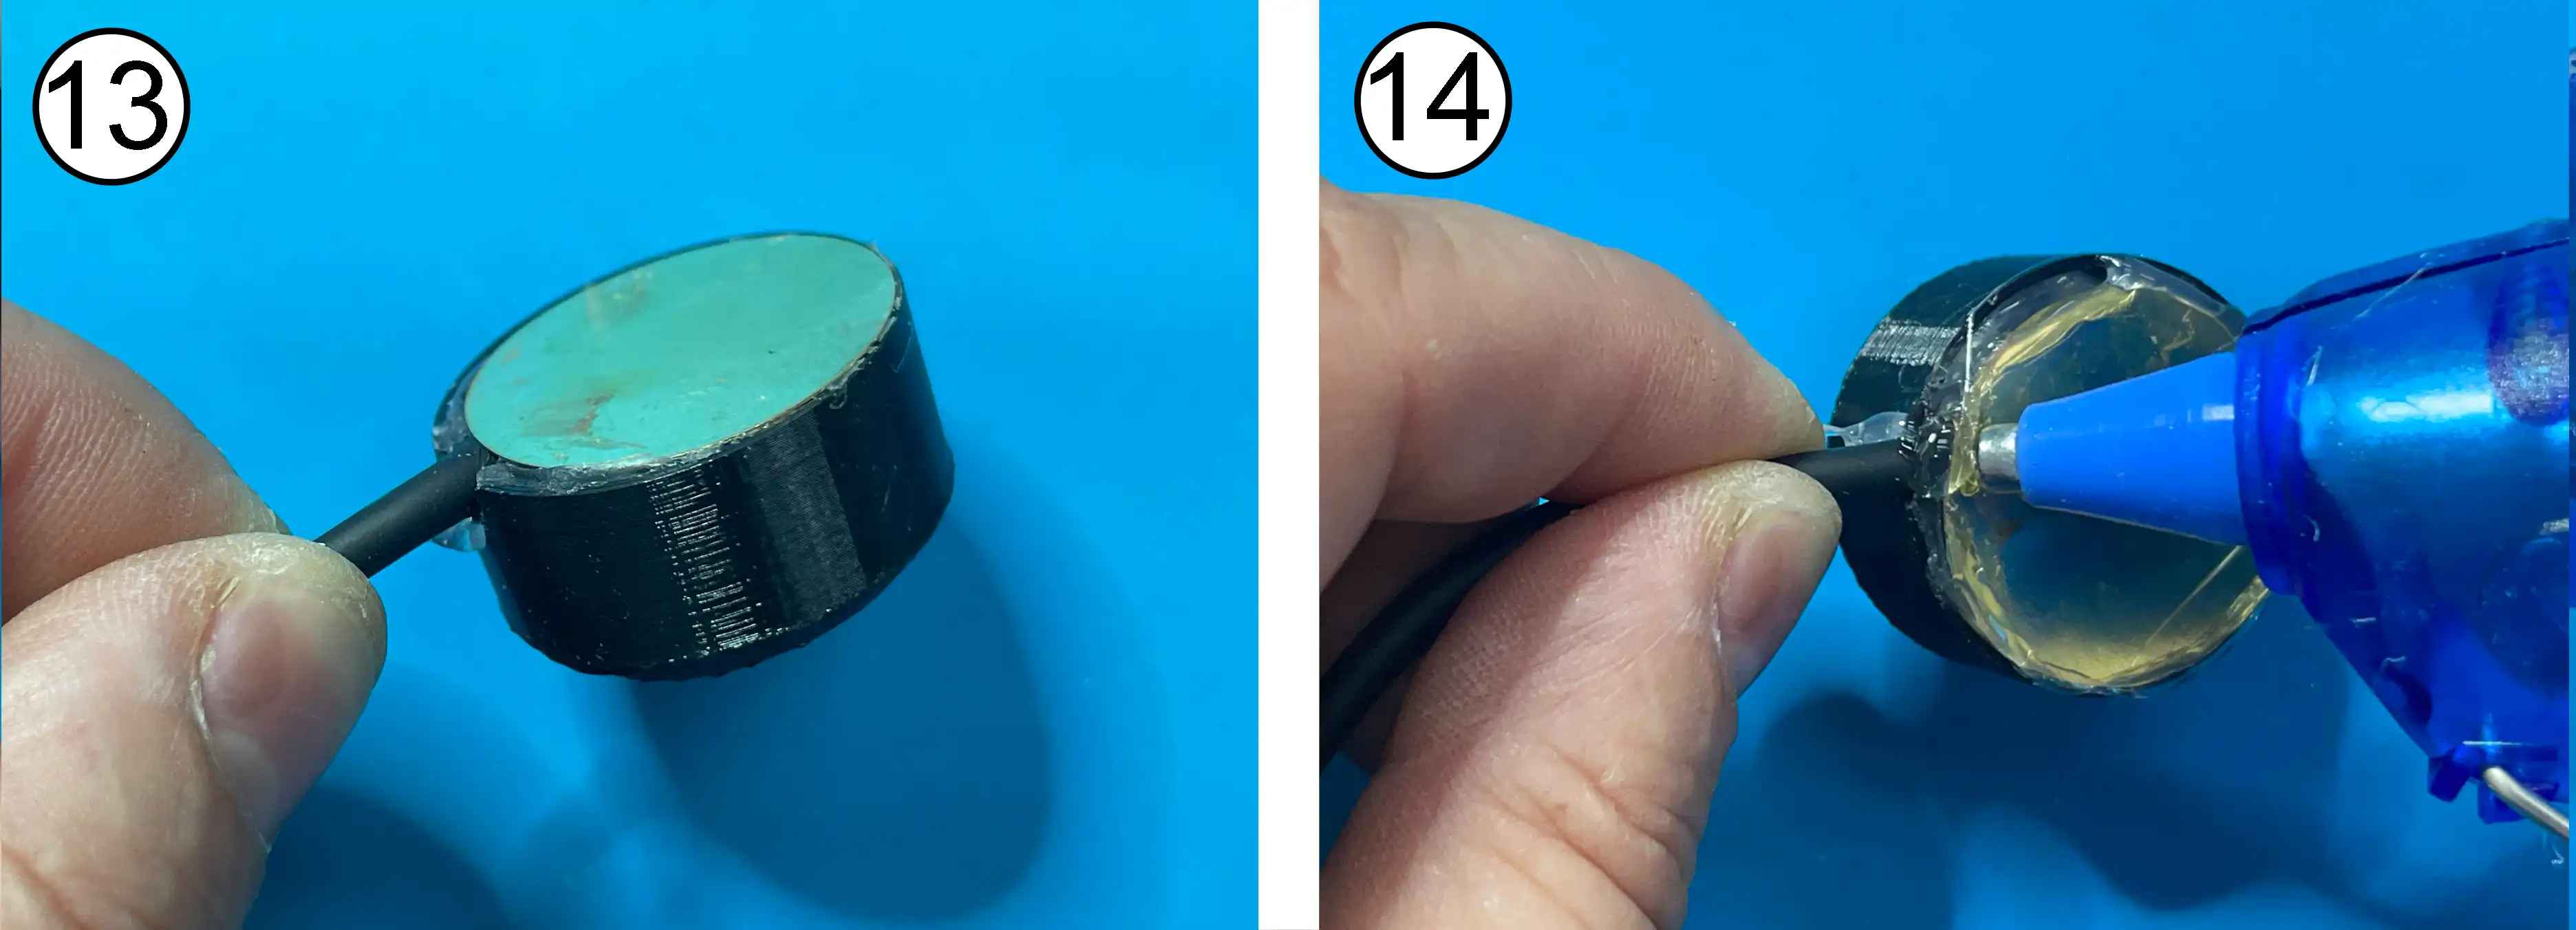
13 - Fit the piezo into the cap, lining up the cable with the notch. This will need to be done QUICKLY before the glue cools and sets.
14 - Add a thin layer of glue around the edge to make sure any gaps are filled, paying particular attention to where the cable joins. Do not use too much glue here
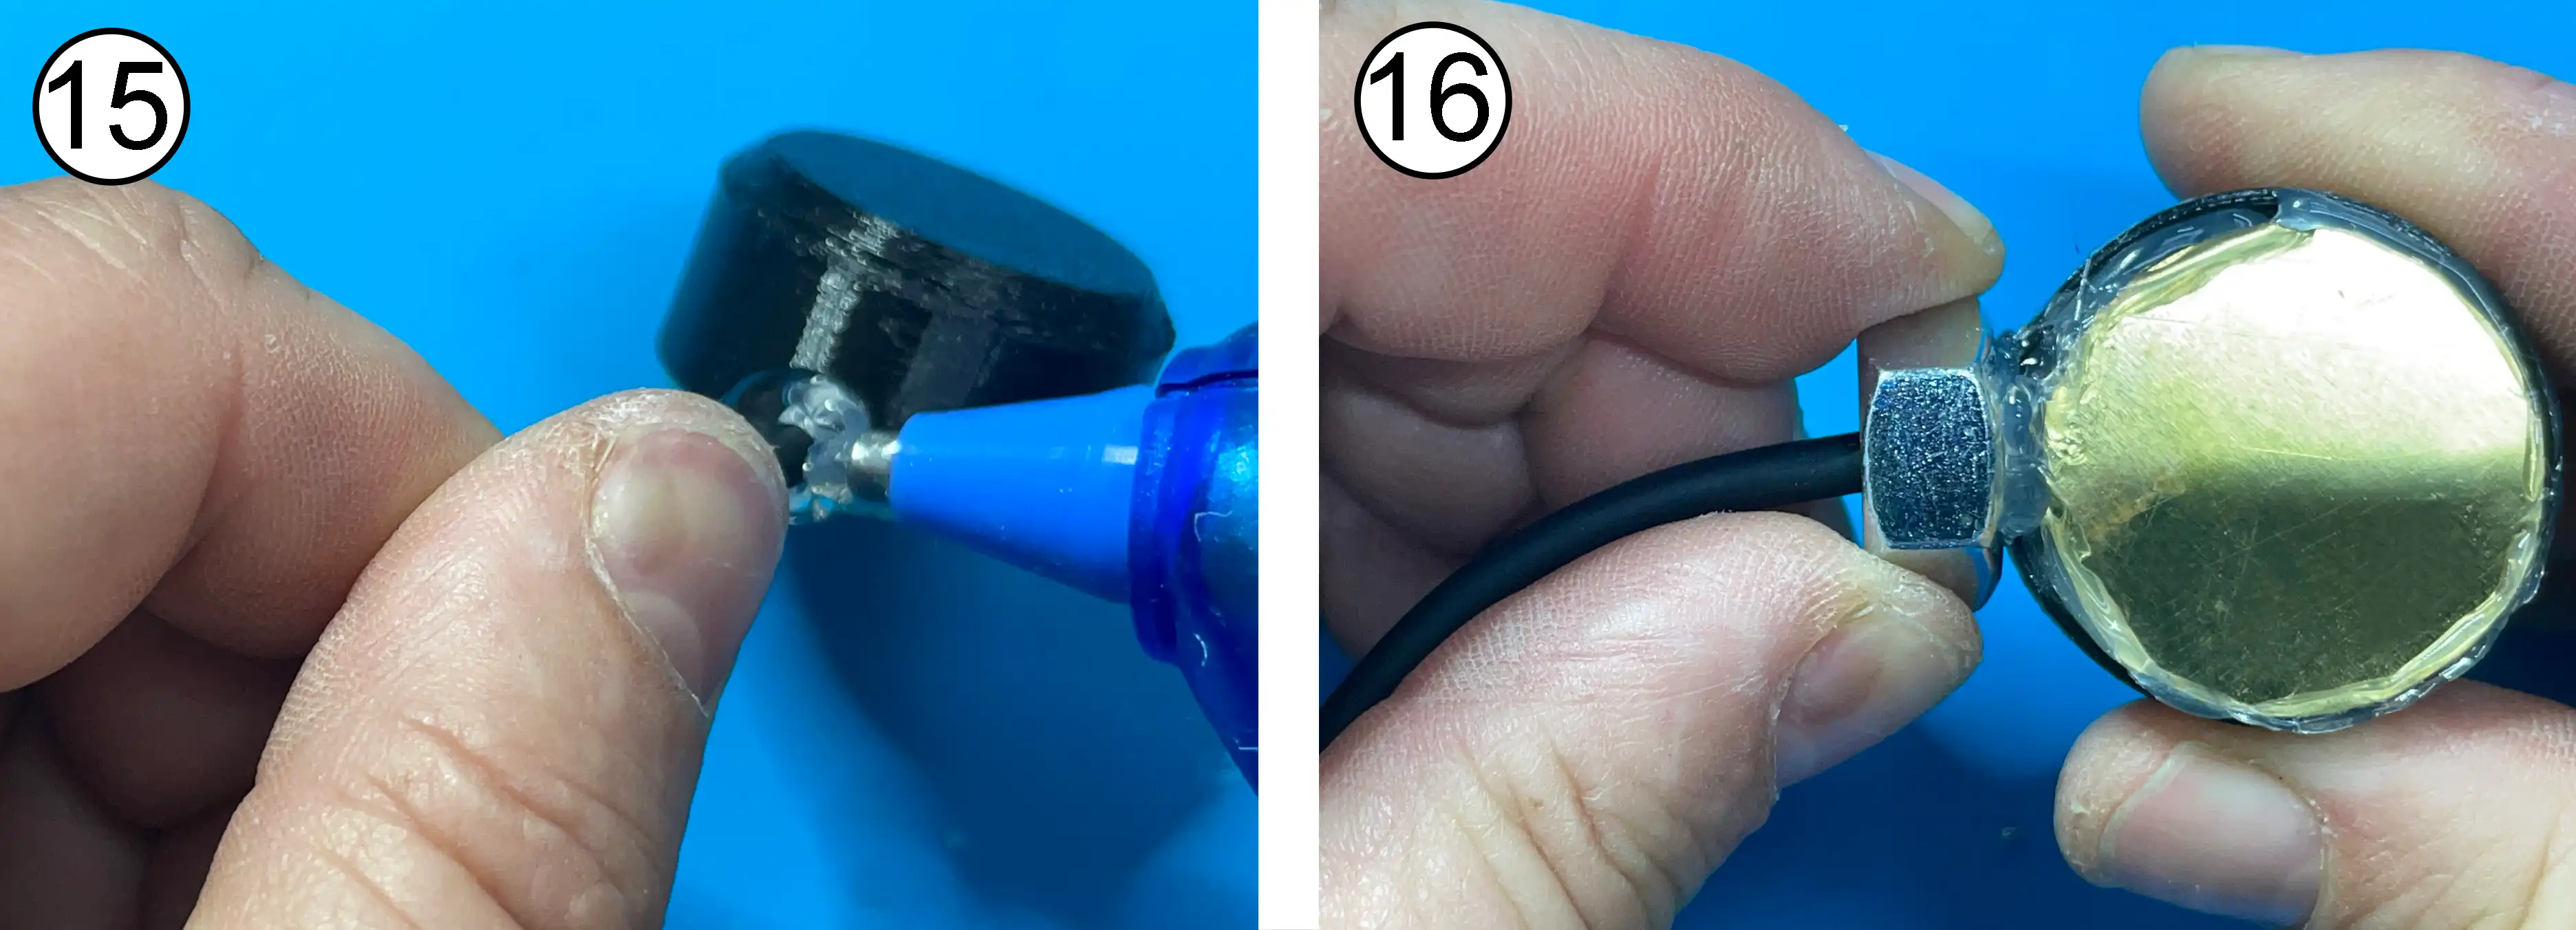
15 - Add a good amount of glue around the cable where it joins the cap.
16 - (Quickly, before the glue cools and sets) - slide the first M10 nut along the cable to join the cap and glue on as shown.
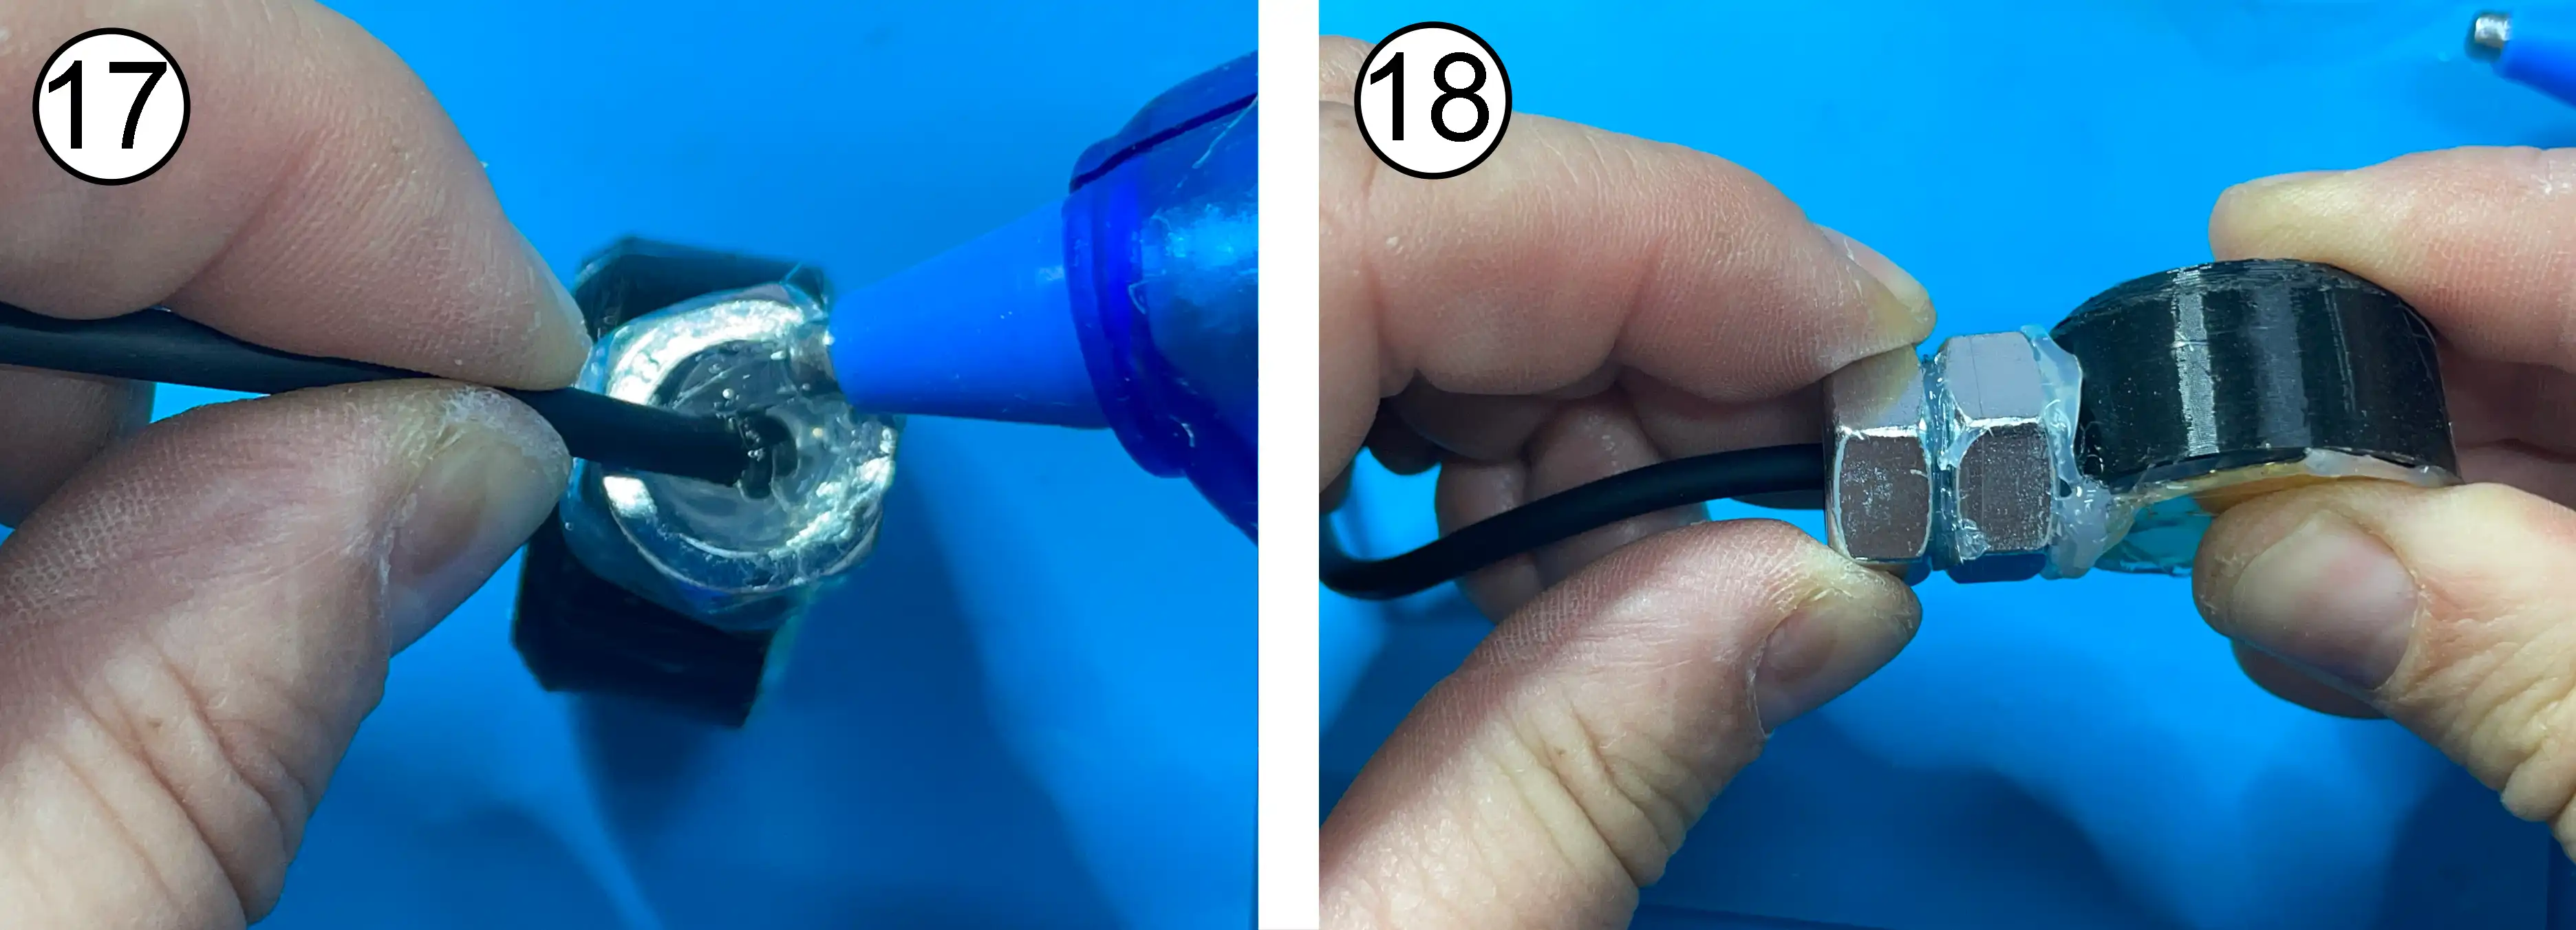
17 - Fill the inside of the nut with glue, and a bit more around the top and higher up the cable.
18 - Slide the second M10 nut along the cable to stick onto of the first one, line up as shown below.
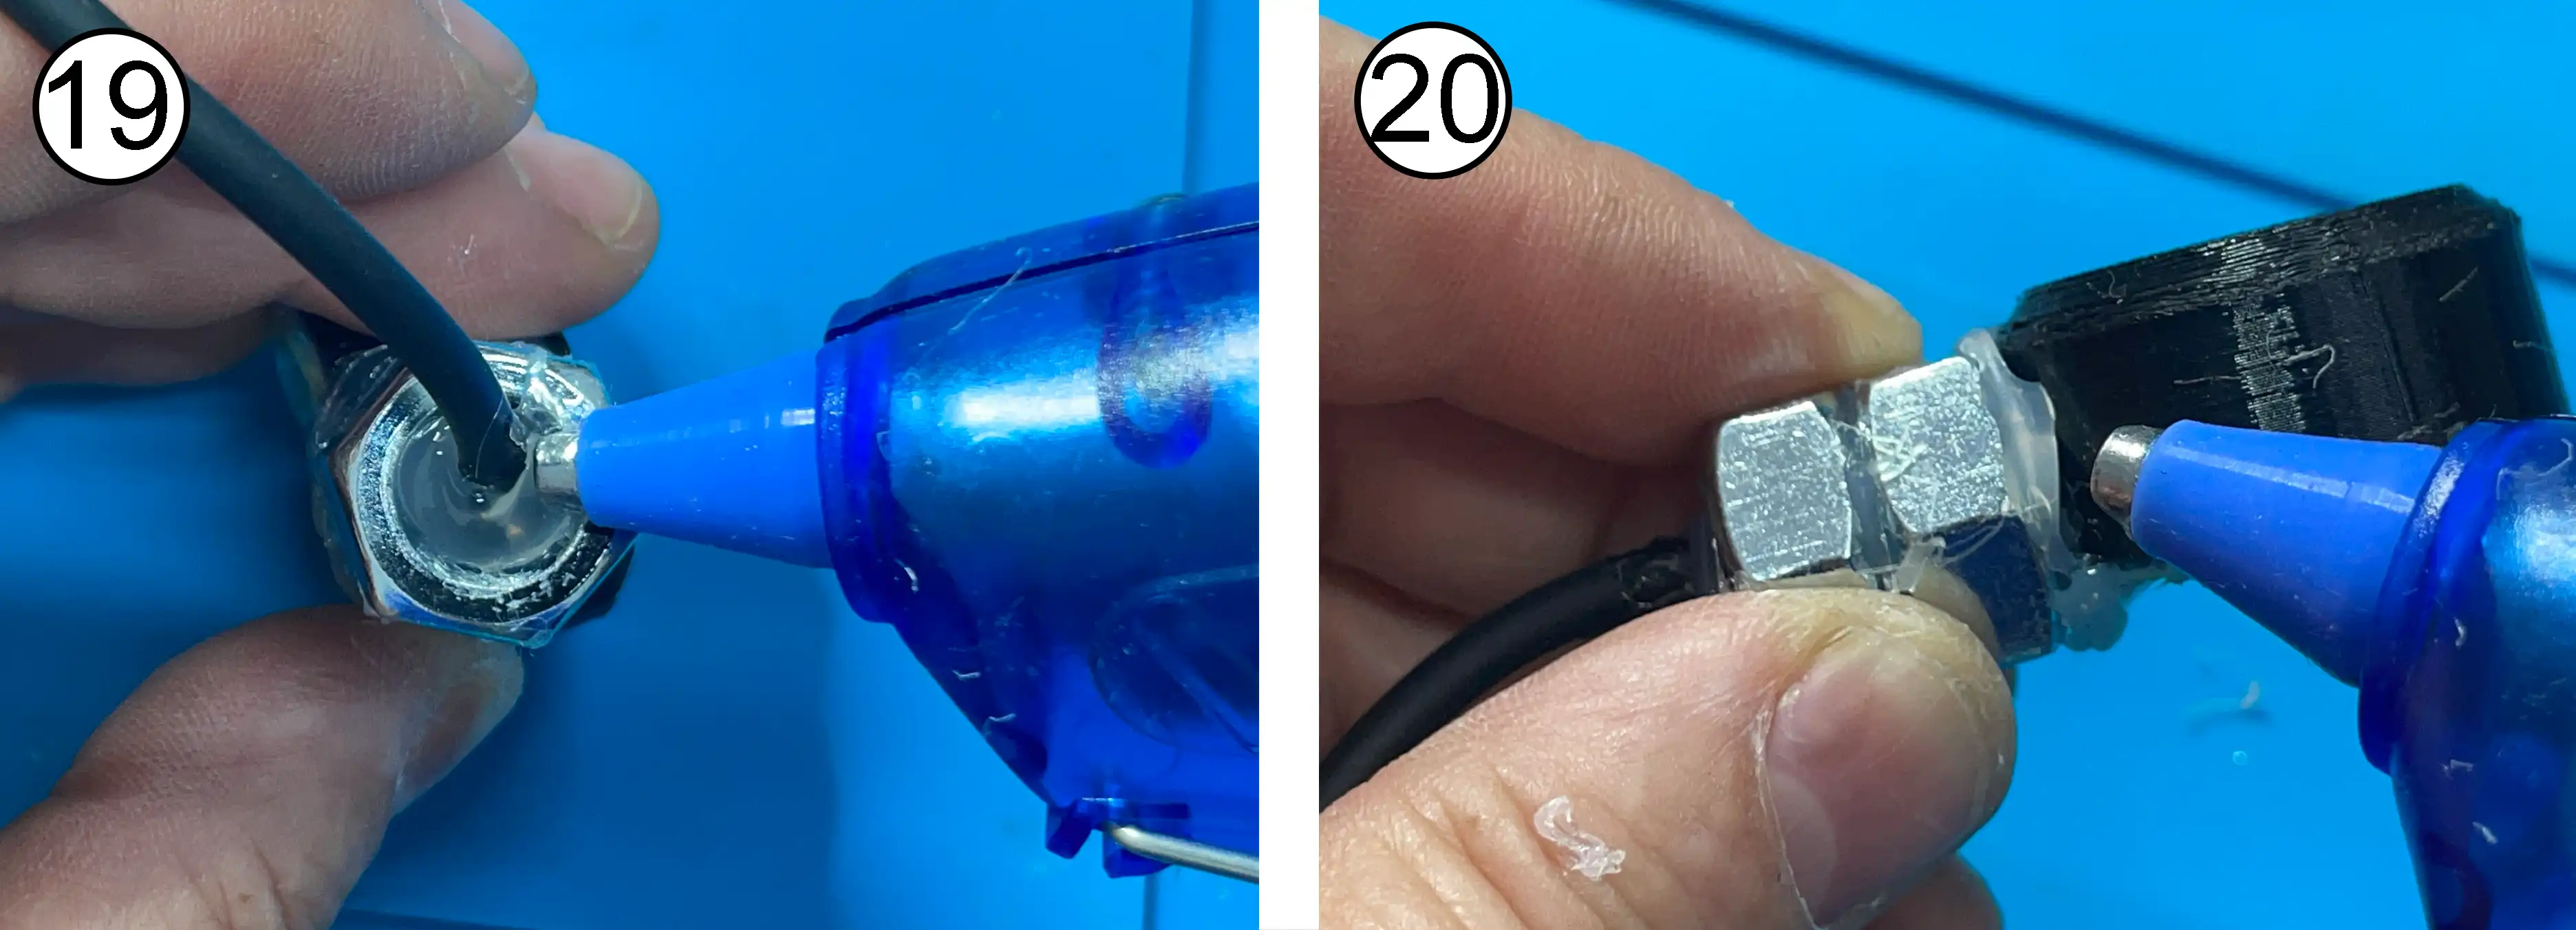
19 - Fill the inside of the nut with glue, make sure it is as even and smooth at the top as possible
20 - Check for any gaps between the nuts and between the nut and the cap - carefully fill with glue, using just enough, then clean off any glue strands
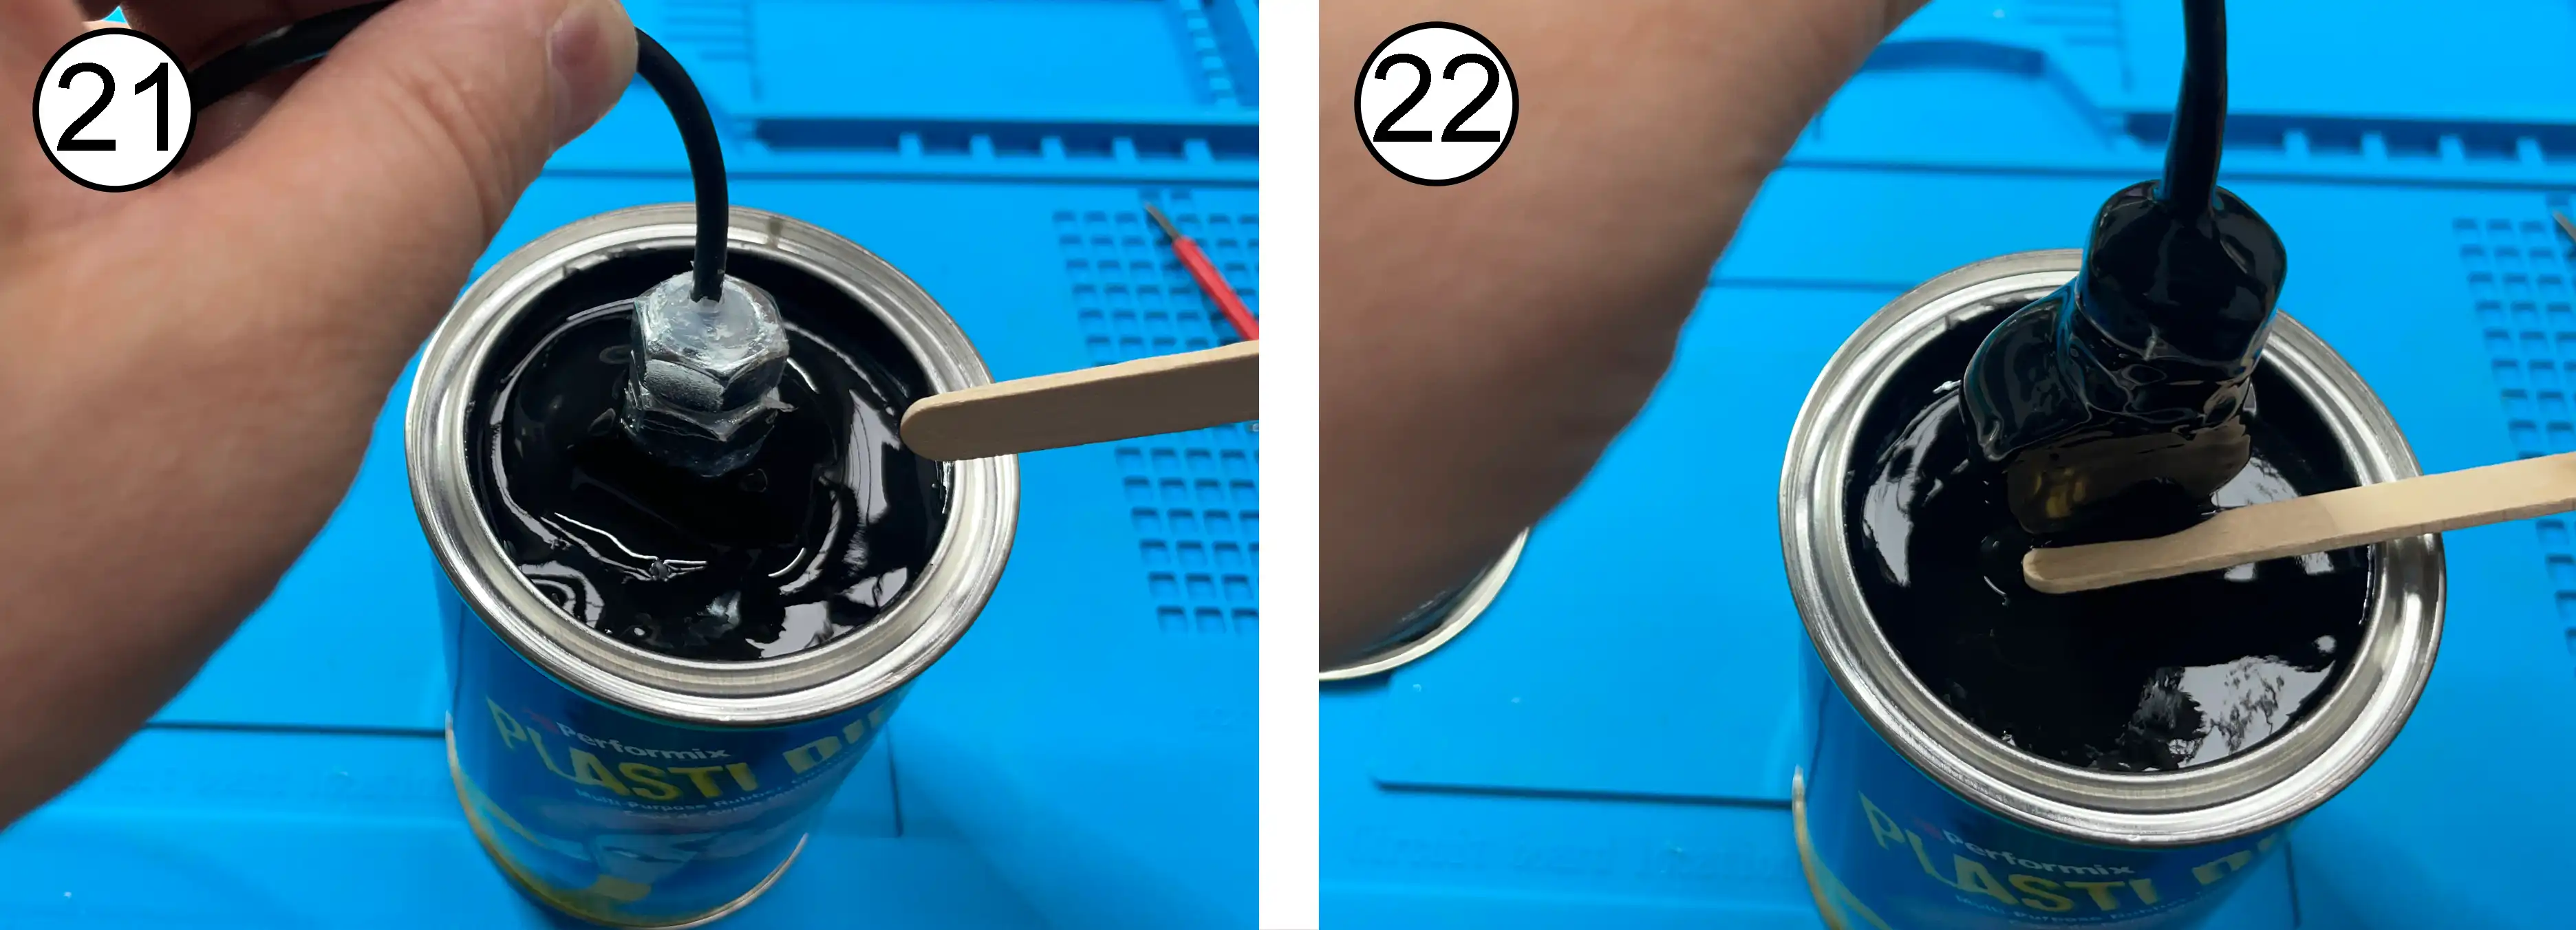
21 - Slowly and carefully dip into black plastidip.
22 - Use a lollipop stick or coffee stirrer to gently scrap off excess plastidip, but make sure all the surfaces are covered, especially at the points where the piezo meets the cap.
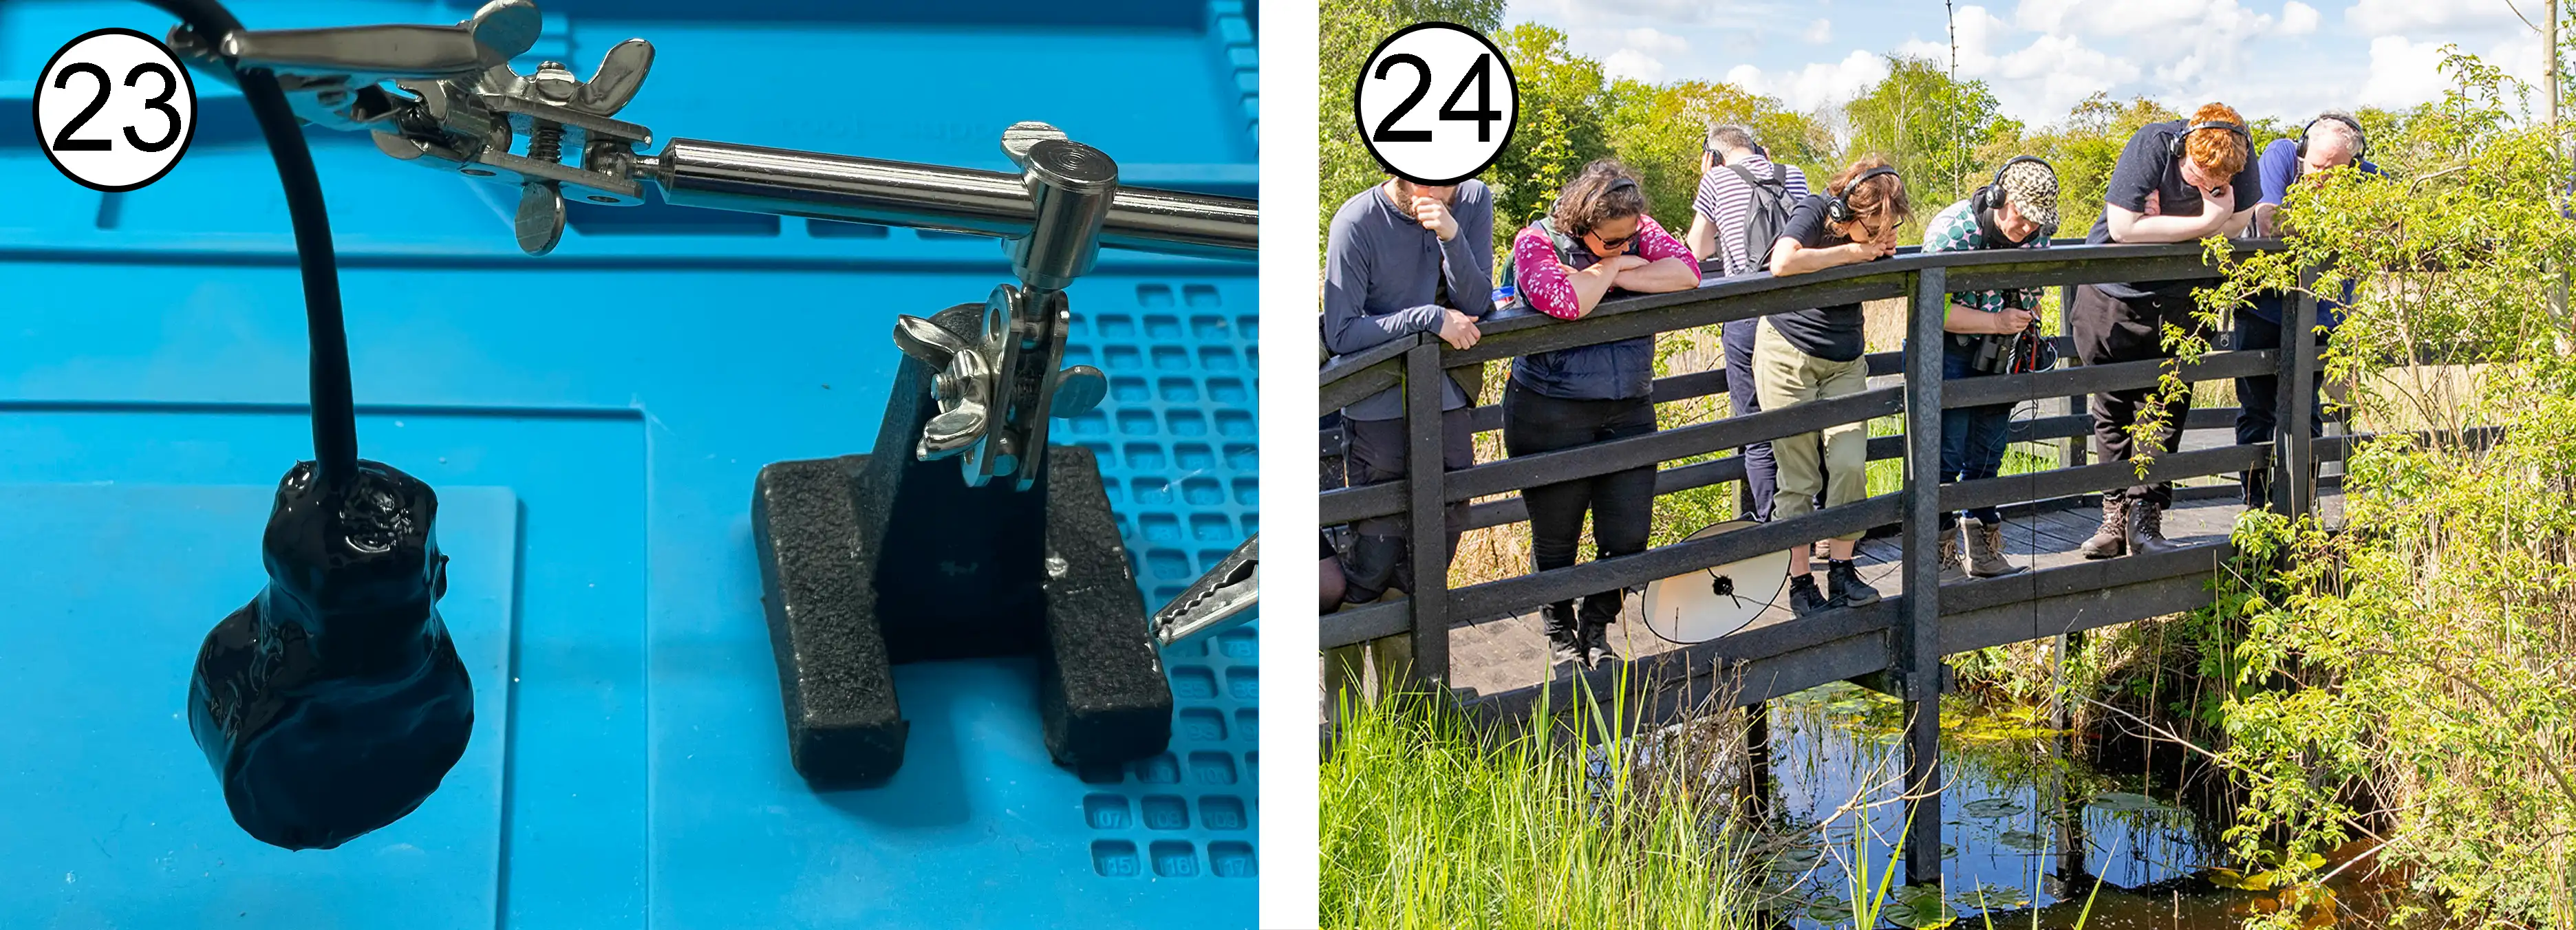
23 - Hang up to dry for about an hour. Examine it when set. It is recommended to do a second dip to cover any gaps or weak points. Remember - it has to be waterproof - BUT - try not to add too much plastidip or hot glue because it will make it less sensitive.
24 - Enjoy listening to underwater sounds with your new hydrophone !
Header photo and photo on the bridge © Mike Selby National Trust